Wednesday, March 1, 2017

Sourdough Starter

Hello again! I know I'm usually a proponent of quick, easy, low-effort recipes, but ever since we bought a house and property that will eventually become our homestead, I've found myself wanting to slow down, to cook and bake from scratch, to plan ahead and lovingly put time and effort into the food we eat. We are on the road to a simpler life, raising and producing our food instead of shopping for convenience, and one of my goals along this road was learning to bake bread.

Of course, bread has been one of the things that I cut out of my diet when I began trying to lose weight and eat more healthfully. We've all heard that carbs are bad for you, and that yeast and gluten are causes of stomach upsets, etc. Yet nearly every culture on every continent of the world has included bread in their diet, usually as a nutrition staple. If we, as the human race, have survived on bread for so many centuries, why is it suddenly something that is bad for us?

The answer is that bread today, as we buy it in the grocery store, is nothing like the bread our ancestors ate! Our bread today is processed, bleached, and lacking most of the good nutrients that God put into plants. No wonder our bodies have a hard time processing it!

I decided to try my hand at sourdough bread. Of course, being home only a few days a week makes it difficult, but I managed to make a sourdough starter in 3 days that has now been alive for a few weeks. I have done more baking in the past few weeks than I have in the past several years - and I'm enjoying it! A lot of people have asked for the recipes that I've been using, so I will be sharing a series of recipes that have worked for me. I should also mention that I've been baking with honey to replace sugar lately, and I'm feeding my starter with all-purpose flour, I've been using whole wheat flour or a mix ratio of both in my baking. Also, you will want to use filtered water for your starter and baking, as the chlorine in plain tap water might mess with the good organisms in sourdough.

So, what's the first step in sourdough baking? A good starter, or sourdough mother. For this, you will need flour, water, and yeast, as well as non-metallic bowls and utensils and something to cover the bowl.

Ingredients:
1 package active dry yeast
2 cups flour
2 cups water, room temperature

Good bubbles!
Stir the ingredients together in a large bowl until combined, cover with a towel, and leave in a warm-ish place where it will not be disturbed. For three days (or more), feed twice daily with another cup of water and cup of flour, stirring gently until just combined.

By the second day, there should be bubbles and a pleasant sour smell. If the smell becomes sharp and unpleasant, or the starter turns any color besides the pale tan dough color (i.e., pink, green, orange), immediately throw out! On the third or fourth day, as long as there are plenty of bubbles and pleasant sourness, pour the starter into a container (such as a mason jar), but leave the lid loose enough to allow it to breathe.

If you're planning to feed and use the starter daily or every other day, then leave it on your countertop. If you will use it only once a week, like me, then keep it in your fridge and take it out only on weekends.

The internet has a wealth of information, recipes, and ideas for using your new sourdough starter. So far, I've used it to make bread (of course), dinner rolls, muffins, cupcakes...the possibilities are nearly endless!

Monday, January 23, 2017

Orange Dreamsicle Cupcakes

Traditionally, through the years, I've had lemon pie or lemon cake for my birthday. But both seemed too much like spring for this year, so instead I decided to make orange cupcakes. You might be familiar with the old Weight Watchers recipe for cake, using just a dry cake mix and a can of soda, but I've found that recipe to be too crumbly for sheet cakes. It's absolutely perfect for cupcakes, however! And this recipe is relatively low fat!

Cupcake Ingredients:
1 box vanilla cake mix
1 12 oz can orange soda
1 tsp vanilla extract

Frosting Ingredients:
1 can whipped vanilla frosting
2 tsp orange extract
Red and yellow food coloring
Candy orange slices, optional

Mix cupcake ingredients and bake in cupcake tin as directed on the box. Cool completely.

Beat frosting ingredients together and use a knife or frosting bags to frost cupcakes. Top with candy pieces, if desired. Enjoy!

Wednesday, December 21, 2016

Microwave Blueberry Cobbler

Microwave blueberry cobbler with blueberry sauce
This recipe starts out very similar to my Microwave Cake recipe, and is a great example of one base recipe being adaptable! I used frozen blueberries, since we have a tiny freezer now, but fresh would probably be fine (just keep an eye on the cooking times).

Ingredients:
1/2 cup dry yellow cake mix
1 tsp oil
1/3 cup water
3/4 cup blueberries, divided
2-4 tsp sugar

Cobbler: Mix dry cake mix, oil, and water together in a bowl, making sure there are no lumps. Add 1/4 cup blueberries and mix well. Microwave 2 minutes and check. If batter is still wet, microwave in 10-15 second intervals until cake is set. Set aside to cool.

Topping: Place 1/2 cup blueberries in a bowl and add just a splash of water and 2 tsp sugar. Microwave 5 minutes and check. Berries should be cooked and there should be liquid in the bowl. Taste and add sugar as desired. Let stand to thicken, about 3 minutes, then serve on top of the cobbler and enjoy!

Tuesday, December 20, 2016

Spaghetti Squash

Spaghetti squash with alfredo sauce and garlic chicken
First off, let me start by saying that I have wanted to try spaghetti squash for awhile but wasn't sure exactly how to do so in the truck. I then ran across directions for cooking it in the crockpot - problem solved! They also recommended sautéing it afterwards - also no problem. Easy peasy! And, I must say, it really was very easy!

Unfortunately, I must also add that I was disappointed in the flavor. I was hoping to enjoy it, or at least tolerate it, as a good way to cut carbs and up veggie intake. However, spaghetti squash seems to me to have a sweet, almost nutty flavor, kind of like a lighter version of pumpkin. It really wasn't bad...if you like sweet veggies, that is. Me? I don't like mixing sweet and savory flavors together. I don't eat fruit on salad, I don't like sweet and sour sauce, etc. So the combination of the sweet-ish squash with the creamy alfredo sauce and garlic chicken was, I am disappointed to admit, not something I enjoyed.

I have talked to a lot of people who have suggested different kinds of sauce or flavors to pair it with, and there might come a day when I feel particularly adventurous and decide to try it again. In the meantime, however, here's the recipe. If you feel adventurous, give it a try and tell me what you think. Or feel free to share your favorite recipe or flavor pairing with me!

Ingredients:
1 small spaghetti squash
1/2 cup water
Olive oil and garlic, if desired

Cooked squash
Prick spaghetti squash 6-10 times with a sharp knife. Place in the crockpot on low with the water and let cook approximately 4 hours. When the flesh is tender and the knife slides easily when you prick it, pull it out and cut it in half, width-wise. Scoop out the seeds, and shred the flesh with a fork. It should separate easily in long strings. If desired, sautee with olive oil and fresh garlic, and top as desired.

Sunday, December 11, 2016

Spinach-stuffed Chicken

Spinach-stuffed Chicken with Rosemary Pepper Potatoes
This recipe is very, very similar to my Spinach-stuffed Bacon-wrapped Pork Chops recipe, but significantly less work! I knew I wanted to experiment more with the idea of cheesy spinach stuffing, especially since I don't usually like cooked spinach! Last time, I used fresh spinach, sautéed with butter and garlic and then mixed with cheeses, but this time I used half a block of frozen spinach. We just recently received a fridge in our truck, and it has a tiny freezer in it - I can't tell you how excited it makes me, because it opens up possibilities that were never available before, such as frozen fruits and veggies!

Ingredients:
5 oz frozen spinach, reheated
4 oz lowfat cream cheese
1/4 cup mozzarella cheese
2 Tbsp parmesan cheese
4 tsp fresh minced garlic, divided
2 large chicken breasts
Additional seasoning to taste

Mix the reheated spinach with the cheeses and 2 tsp minced garlic, set aside.

Rub the chicken breasts in minced garlic and any other desired seasonings. Cook in a skillet on medium heat till juices are clear and no longer pink. Carefully cut a slit lengthwise down the middle of each breast. Holding the slit open with tongs, spoon spinach mixture into the opening. Add more spinach mixture on top and allow to cook until thoroughly heated (any excess spinach stuffing can be heated in the pan). Serve and enjoy!

Wednesday, December 7, 2016

Microwave Bread

Bread with pot roast and potatoes
Well folks, it took me well over a year, but I finally figured out how to make bread/biscuit-ish in the microwave! Let me clarify. It came out a sort of spongy, soft, almost cake-like bread, with a consistency similar to moist cornbread. It won't get the crusty effect of an oven, but it made a nice soft bread with good flavor.

I figured I could use Bisquick mix, but wasn't sure exactly how it would work in the microwave. My first attempt was a stiff dough like what you would make for biscuits in the oven, and the result could probably crack a windshield if thrown hard enough. There had to be a better way!

My second attempt was a much wetter batter, more like what I use for Microwave Cakes, and I added minced garlic and Italian seasoning for flavor. The finished product was a soft and tasty bread/biscuit. I served it with roast and potatoes, and was great for soaking up roast juices!

Side view of bowl of bread
Ingredients:
1/2 cup Bisquik baking mix
1/3 cup water
1 Tbsp olive oil
Seasonings to taste

Mix all ingredients in a microwave-safe bowl until batter is smooth with no lumps. Microwave 90 seconds and check. If bread is still a little doughy, microwave another 30 seconds. Let cool, it will firm up more as it cools. Enjoy!

Thursday, November 3, 2016

Salads For Days

In an effort to eat more healthy foods and lose some weight, I have committed to #DailyVeggies, making sure I have at least one serving of vegetables every day. Since I detest most cooked vegetables, this means that a meal-sized salad is my best veggie option. Therefore, #SaladaDay has become my usual lunch. Of course, salads don't have to be boring or bland - not at all! There are many variations and possibilities when it comes to salads. I thought I would share some of my favorites with you, and please feel free to share your ideas with me! I'm always looking for more ideas!

Basic chicken salad: romaine lettuce mix, grilled chicken, corn, bacon bits, cheese, and a light drizzle of thousand island .

Taco salad: mixed lettuce, taco seasoned beef, queso blanco sauce, salsa, sour cream, and cheese. No dressing needed!

Deconstructed sandwich salads: basically the ingredients of a sandwich, placed on top of a salad. This one was lettuce and radicchio mix, chopped steak strips, half an avocado, lowfat provolone cheese, and Green Goddess dressing.

Extra protein salads: for those days when you need more protein, adding navy beans, hummus, and boiled eggs to the salad gives it both flavor and protein kick.

Tuna salad: these days you can get flavored tuna packets in a variety of flavors. I don't usually like tuna, but the ranch flavor is really good! Here's lettuce mix, ranch-flavored tuna, navy beans, peas, cheese, and Green Goddess dressing.


Think outside the box: salad doesn't always have to start with a leafy green base. Try other combinations like beans, tomatoes, avocado, eggs, different cheeses, or other vegetables that strike your fancy. I'd like to hear what ideas you come up with!

Wednesday, November 2, 2016

Crockpot Noodle Casserole

This recipe is basically an adaptation of my Tuna Noodle Casserole recipe that I made in the crockpot and substituted chicken and turkey instead of tuna. It was an easy two-hour meal in my pressure cooker crockpot, and turned out tasty and filling. I didn't have fresh chicken handy, so I used a can of chicken and a can of turkey for the meat. I also used a can of roasted garlic cream of mushroom soup instead of plain, which gave it a wonderful savory flavor!

Ingredients:
1 can cream of mushroom soup
1 cup milk or 1 can of evaporated milk mixed with water
1 cup water
1 cup shredded cheddar or fiesta blend cheese, divided
3/4 cup peas, frozen or canned
Garlic powder, seasonings as desired
1 1/2 cup cooked chicken, turkey, or tuna
3 cups dry medium egg noodles

Mix the soup, milk, and water together in the crockpot. Add 1/2 cup of the cheese with the peas, seasoning, and meat, and mix thoroughly. Add the noodles and stir to cover the noodles with the liquid mixture. Cook on low setting for 4 hours or high setting for 2 hours. Check that the noodles are tender and most of the moisture is absorbed, if not cook longer. Top with the other 1/2 cup cheese and cook for another half hour. Serve and enjoy!

Tuesday, October 25, 2016

Salsa Chicken Bake

This meal was born of Pinterest ideas (who am I kidding?! Most of my recipes are tweaked Pinterest finds!), and hubby heartily approved and went back for seconds. It's easiest made in the oven, but could probably be modified for the grill or even a skillet. I made taco rice in the skillet while the chicken and bean mixture baked, then topped my serving with sour cream. It was very tasty and filling!

Ingredients:
Chicken breasts, cut into strips
1 can black beans, rinsed and drained
1 cup corn, frozen or canned
3/4 cup salsa
1/2 cup queso blanco sauce
1/2 cup shredded cheddar or fiesta blend cheese

Preheat the oven to 400. Spread the beans and corn evenly in the bottom of a large oven or casserole dish. Trim the chicken strips and arrange them on top of the bean mixture. Spread the salsa and queso evenly on the chicken strips and sprinkle with cheese. Bake at 400 for 30-40 minutes, checking occasionally. When chicken is cooked through, remove from the oven and serve with rice or tortillas. Enjoy!

Thursday, October 20, 2016

Pumpkin Cheesecake (No Bake)

I have to tell you, this SO hit the spot!! I had been wanting pumpkin cheesecake when I came across this easy recipe. I was good and let it chill overnight...then ate half of it for breakfast the next morning!

Ingredients:
1 premade graham cracker crust
1 16oz block cream cheese, softened
1/2 cup sugar
1/2 brown sugar
1 15oz can pumpkin puree
1 tsp vanilla extract
1 Tbsp pumpkin pie spice
8 oz cool whip, thawed

Blend cream cheese, sugar, and brown sugar till creamy. Add pumpkin, vanilla, and spice and mix well. Fold in cool whip. Pour mixture into graham cracker crust and smooth with a spatula. Let chill 4-6 hours or overnight before serving. Enjoy!

Tuesday, October 11, 2016

Tortellini Alfredo with Spinach

This was a relatively simple meal to make. It would have been easier with two pans, but my electric skillet worked just fine. I used a package of premade tortellini and a package of grilled chicken for this tasty, easy dinner. Enjoy!

Ingredients:
2 cloves fresh garlic, minced
Butter or olive oil
1 1/2 cups fresh baby spinach
1 package premade tortellini
1 cup cooked chicken
1 jar garlic alfredo sauce

Lightly sautee the garlic in heated butter or oil. Add the spinach and sautee until wilted. Set aside.

Boil the tortellini according to the directions on the package till tender, drain. Add the chicken, sauce, and garlic spinach mixture. Simmer all ingredients together until heated through, stirring frequently. Serve and enjoy!

Friday, October 7, 2016

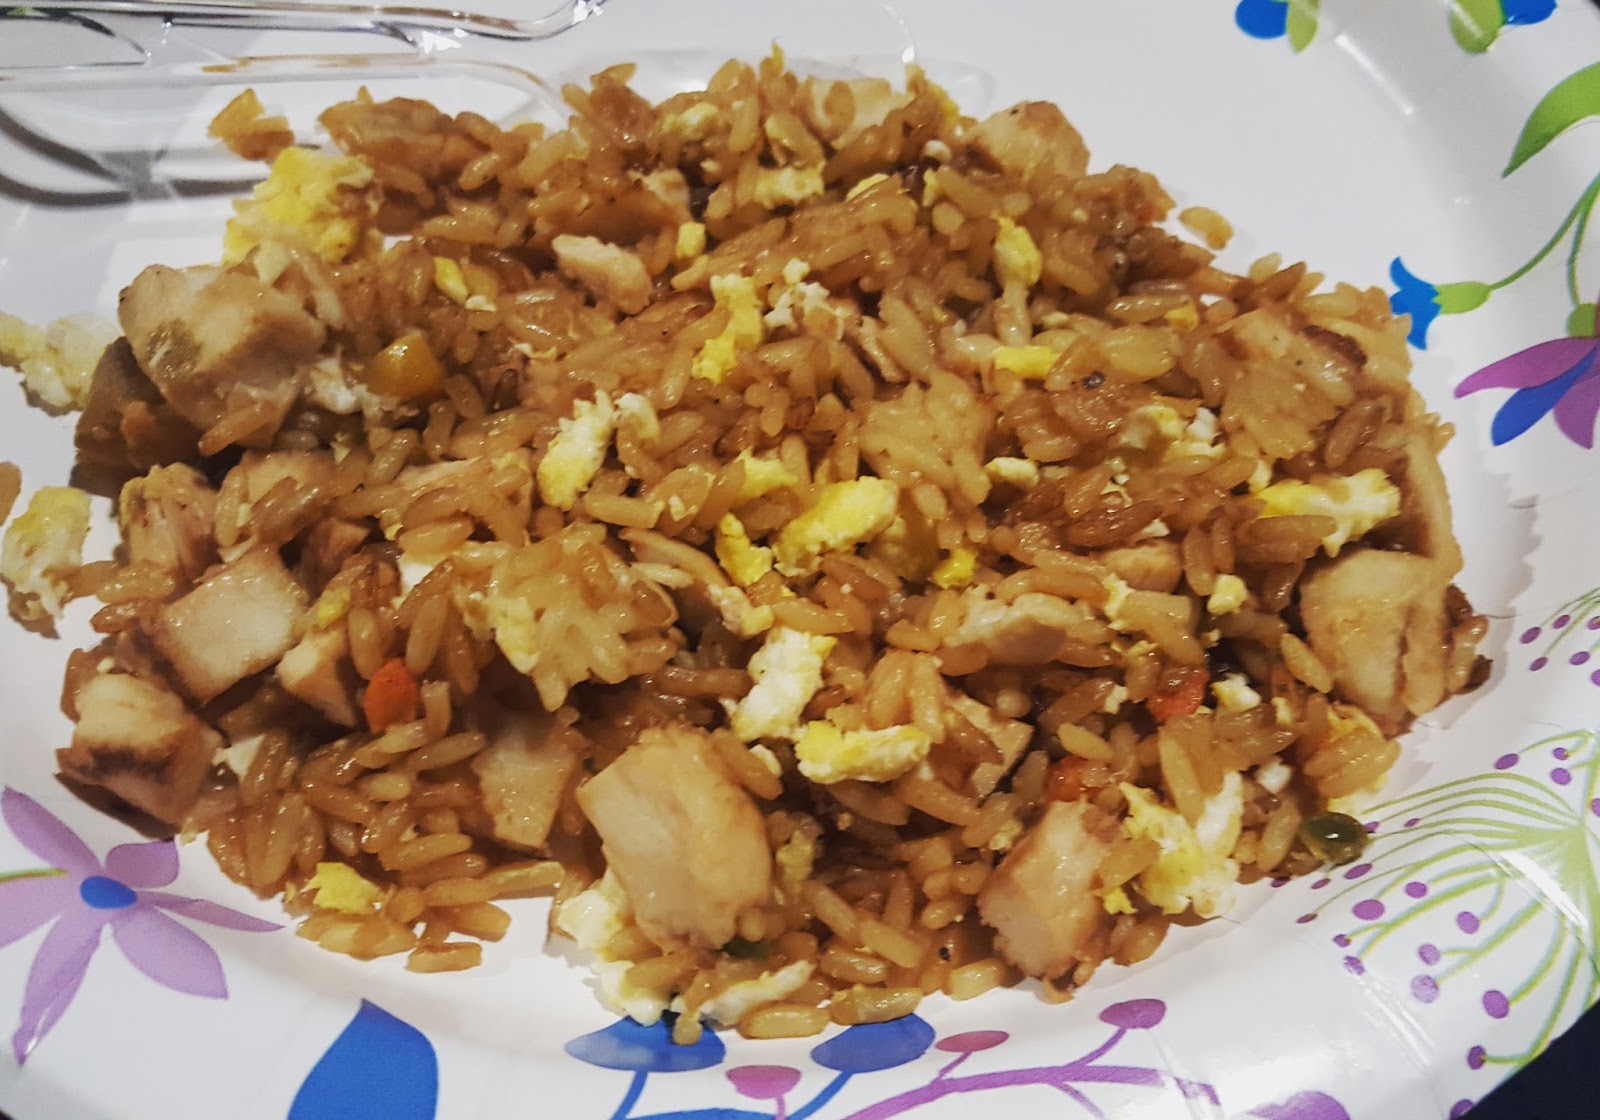
Easy Chicken Fried Rice

After having Chinese takeout a few times, I fell in love with fried rice. I decided to try making it on the truck, and after researching a few recipes, I figured I could make it with ingredients I had on hand - leftover soy sauce packets from takeout, pre-cooked grilled chicken, and ready rice. We really enjoyed the result and plan to make it again!

Ingredients:
1 cup cooked chicken
3 Tbsp soy sauce
1 package garden vegetable ready rice
2 eggs

Chop the cooked chicken into small pieces and place in a warm skillet with 2 tablespoons soy sauce. Coat the chicken in the soy sauce and heat it through. Add the rice, breaking down any chunks, and the third tablespoon of soy sauce. Sautee together. Push the rice and chicken mixture to the edges of the skillet, opening an area in the middle of the skillet. Add the eggs into the center of the skillet, scramble them with your spatula, and allow them to cook until firm, stirring the rice mixture to keep it from burning. Chop the eggs into small pieces and mix them in with the rice and chicken. Serve and enjoy!

Wednesday, September 28, 2016

Glazed Pumpkin Bread

Autumn is here! There's something about the crispness in the air and the beauty of changing leaves that makes autumn one of my favorite seasons. Of course, as the weather changes so do our food cravings. Soups, chilis, and casseroles are the perfect comfort foods for chilly fall days, and pumpkin-themed recipes are a must! This easy recipe makes a moist, dense pumpkin bread, not overly sweet but packed with spice and autumn flavor. The glaze on top adds the perfect kick to make this a recipe you'll definitely want to try this autumn!


Feel free to try adding complementary ingredients, such as chocolate chips or dried cranberries. The glaze is pretty easy, although it can be made easier by simply warming up cream cheese frosting instead. Either way, this bread is best served warm with a little butter...yum!

Bread Ingredients:
1 box spice cake mix
1/2 cup sugar
1 can pumpkin puree
1 tsp cinnamon
1 tsp pumpkin pie spice
2 eggs
1/4 cup milk

Glaze Ingredients:
4 oz cream cheese, softened or spreadable
1/2 cup powdered (confectioners) sugar
1 tsp vanilla extract
4 tablespoons milk

Preheat oven to 350 and grease 2 loaf pans. Mix the dry cake mix and sugar together. Add pumpkin, spices, eggs, and milk until smooth.

Divide evenly into loaf pans and bake for 50-60 minutes. Bread is done when top is golden and no longer looks liquidy. Let cool 10 minutes then remove from loaf pans.

Combine glaze ingredients and beat till smooth. Spoon or drizzle glaze over pumpkin loaves. Serve warm and enjoy!

Thursday, September 1, 2016

Spinach-stuffed, Bacon-wrapped Pork Chops

I don't like cooked spinach - never have, never will. But my hubby does, and it's good for you, and it was a required ingredient in a Chopped Challenge cooking competition this month. So, after a bit of research, I came up with this idea - make a cheesy spinach stuffing, put it inside pork chops, and wrap bacon around the outside. Now if that doesn't make you start drooling a little, I don't know what will!

Ideally these would be made in an oven, but since I am on the road at the moment, I made them in the skillet. They tasted great, though the bacon outside didn't get as crispy/cooked as I'd like. I used the thickest pork chops that I could find so that the pocket wouldn't cut all the way through them.

While they were cooking, I chopped up baby golden potatoes and sautéed them with butter and diced fresh garlic, letting them cook at the same time as the pork chops. After the pork and potatoes were done, I served them onto a plate, put butter, parmesan, garlic powder, and Italian seasoning on hoagie rolls and placed them face down in the hot skillet to toast. The result? Amazingness.

Ingredients:
2 Tbsp butter
1 clove fresh garlic, diced
1-1 1/2 cups fresh spinach
1/4 cup shredded mozzarella cheese
4 oz cream cheese
2 thick boneless pork chops
4 slices bacon
Wooden toothpicks
Italian seasoning

Start by melting the butter in a skillet and sautéing the garlic for about a minute. Take the stems off the spinach and add to the skillet, sautéing until wilted. Combine the mozzarella and cream cheese in a small bowl and stir in the spinach. Set aside.

Using a sharp knife, very carefully cut a pocket into each pork chop, leaving 3 sides intact. Divide the spinach mixture in half and stuff it down inside the pockets. Wrap each chop in 2 slices of bacon, making sure the widest part of the bacon is over the pocket of stuffing, and using toothpicks to secure the overlapping areas. Sprinkle both sides of the chops with Italian seasoning. Cook in a skillet or oven for about 40 minutes, flipping occasionally, until juices run clear and the center of a chop is only slightly tinted pink. Serve and enjoy!

Strawberry Cucumber Spinach Salad

This salad is relatively easy to make, even on the truck (though preferably not while the truck is moving, since bumpy roads and sharp knives don't play well together). The easiest thing about this salad is that it basically makes its own dressing. Cool, right? Look how bright and springy this salad looks!

Ingredients:
1 small cucumber
8-10 strawberries
Fresh parsley or basil
1/4 tsp lemon juice
1/4 tsp lime juice
1/2 tsp olive oil
1/2 tsp apple cider vinegar
Fresh spinach

Peel and dice cucumber and dice strawberries. Place in a plastic zipper baggie and add a few torn leaves of parsley or basil. Add the 4 liquid ingredients, seal the baggie, and gently move the ingredients around to combine them. Prepare two plates of fresh spinach, de-stemmed and torn into bite size pieces, and divide and pour the strawberry mixture over the spinach. Enjoy!

Saturday, August 13, 2016

Crockpot Lasagna

One of my favorite sounds to hear is the tone of my hubby's voice when he tries a meal that I've made for the first time and likes it...actually LIKES it - not just okay, but good! I got one of those moments yesterday when I made lasagna in the crockpot, and though it was a little bit of work, it was definitely worth it for a meal that we both really enjoyed!

I used Barilla oven-ready lasagna noodles, which don't require cooking first - they absorb moisture and expand as the meal cooks. However, since they are flat instead of ridged like most lasagna noodles, I used a jar of Prego spaghetti sauce with mini meatballs for the inside layers to give it a more interesting texture. You could always cook a pound of ground beef and mix it with regular spaghetti sauce for the inside layers, but this way was a lot simpler.

Ingredients:
1 15oz container ricotta cheese
1/4 cup parmesan cheese
2 Tbsp Italian seasoning
Dash garlic powder
1 jar meat-based spaghetti sauce
1 jar spaghetti sauce with mini meatballs
1 box Barilla oven-ready lasagne noodles
Mozzarella cheese

In a medium bowl, mix the ricotta cheese, parmesan cheese, and seasonings thoroughly. Set aside.

Pour enough of the meat sauce into the slow cooker to cover the bottom of the pot, about 1/3 of the jar. Lay noodles on top, breaking to fit the shape of the pot. Divide the ricotta mixture in half and smooth half of it evenly over the noodles. Place more noodles on top. Pour half of the jar of mini meatball sauce on top, making sure the meatballs are evenly distributed, and top with a layer of mozzarella cheese. Place more noodles on top, and repeat the ricotta and meatball layers. Place more noodles on top and pour the remaining meat sauce over them, ensuring that all the noodles are covered. Top with another layer of mozzarella.

My Farberware 7-in-1 cooked it in 2 hours on slow cooker setting, so a regular slow cooker could probably cook it in 3 hours on low setting. When noodles are soft, cheese is melted, and sauce is hot and firm, serve warm and enjoy!

Saturday, July 30, 2016

Chicken Enchilada Orzo

Yummy!
I am part of a Facebook community called Big Truck Cooking, all about truckers cooking, that has a Chopped Challenge every month. For my entry this month, I'm submitting this easy, oh-so-delicious one-skillet recipe for Chicken Enchilada Orzo.

Since it can be difficult keeping enough fresh or perishable food in the truck to last us 3-5 weeks, I have been developing more recipes using mainly (or exclusively) non-perishable ingredients. The only perishable ingredient in this recipe is cheddar cheese, which can be substituted with shelf-stable cheese like Velveeta or omitted altogether.

Ingredients
Ingredients:
1 can red enchilada sauce
1 can mild Rotel
1 can chicken in water
1 1/2 cup dry orzo
1 can black beans, drained and rinsed
1 small can whole kernel corn, drained
1/2 package taco seasoning
Cheddar cheese

Pour the enchilada sauce, Rotel, and chicken into a skillet without draining. Add the orzo and about a cup of water. Bring to a boil and let simmer until orzo is cooked. Add the drained black beans and corn, stir and continue to simmer. Add half a package of taco seasoning and mix in thoroughly. By now mixture should be thick. Reduce heat, pat mixture firmly down in the skillet, sprinkle cheese on top and let sit to melt cheese. Serve immediately and enjoy!
Serving hot from the skillet

Thursday, July 28, 2016

Easy Beefy Noodles

Easy, quick, and delicious!
This is one of those fantastic, super-easy, 3-ingredient meals you can make in 15 minutes, start to finish. I kinda feel like it's cheating, since I use precooked packaged steak strips, but any cooked or leftover beef will work. And if you feel extra creative, feel free to chop some mushrooms or veggies and toss them in.

Ingredients
Ingredients:
8 oz (half of a 1lb bag) egg noodles
1 jar beef gravy
1 cup cooked steak strips

Place egg noodles in skillet and add 2 cups of water. Bring to a boil and stir frequently till noodles are soft and water is mostly absorbed. Add the gravy, mix well, and let simmer 2-4 minutes. Add steak strips, stir, and cover. Simmer another 2-3 minutes until steak pieces are warmed through and gravy is hot and bubbly. Serve and enjoy!

Sunday, July 24, 2016

Microwave Cakes

Of all the challenges we've faced learning to cook in the semi, probably the most frustrating to me was the apparent inability to bake desserts. Baking has always been one of my favorite forms of relaxation and stress release, and of course we enjoy eating the desserts, but I went nearly a year without being able to bake in the truck. We had a small toaster oven for awhile that was unreliable, and my pressure cooker/crockpot doesn't handle baking cake like some do. However, I finally found the solution: microwave cakes!

Chocolate cakes with chocolate frosting!
It's the same concept as mug cakes, but I usually make them in a disposable bowl made of heavy-duty paper. Styrofoam bowls or the regular ceramic kind would work just as well.  And, of course, the cake and frosting flavors are totally up to you! I buy a few flavors of cake mix and put each in a gallon sized plastic zipper baggie, so I can use them whenever I feel like making one. The topping variations are practically infinite! At the bottom of the post, I've included directions for a fantastically delicious Chocolate Peanut Butter Cake!

Ingredients:
1/2 cup dry cake mix
1 tsp oil
1/3 cup water

Mix all ingredients together in a microwave safe bowl. Microwave for 90 seconds and check. If still wet-looking, microwave another 10-15 seconds. Let cool and top with frosting and/or fruit. Enjoy!
Strawberry cake, cream cheese frosting, banana, and peaches!

Chocolate Peanut Butter Cake
1 chocolate cake, made according to above directions
2-3 Tbsp creamy peanut butter
1/4 cup chocolate frosting 
2 Reeses cups, crumbled

Bake the chocolate cake according to the directions above. Microwave the peanut butter about 20 seconds or until melted into a smooth, thick liquid. Pour evenly over the cake and let sit 10 minutes. Microwave the frosting 20-30 seconds until also a thick liquid and pour evenly over the cake. Immediately top with crumbled candy pieces and let sit 1-2 hours to cool. Enjoy!
Chocolate Peanut Butter Cake

Friday, July 22, 2016

Chocolate Strawberry Cupcakes

My hubby's birthday is coming up and we were having lunch with his parents, so I made these little beauties for dessert. They take some work, but they're actually easier than they look once you get the hang of it. I even got fancy and used a baggie to pipe the frosting on. They were a big success!

Chocolate strawberry cupcakes! 
Ingredients:
1 chocolate cake mix, plus additional ingredients as directed on the box
1 can of strawberry pie filling
1 can chocolate frosting

Prepare the chocolate cake mix according to the box directions and bake as cupcakes. It should make 20-24 cupcakes. Let cupcakes cool completely.

With a butter knife, cut a small circle on top of a cupcake, about an inch deep, and lift it out. Pull off about half of what is attached and set it aside. Open the can of strawberry pie filling, scoop out of spoonful, and carefully pour it into the hole in the cupcake. Replace the top and repeat for the remainder of the cupcakes, trying to make sure every cupcake gets at least one strawberry. See picture below for a visual step by step of the process.

Once all the cupcakes have been filled, scoop about 3/4 of the can of frosting into a small mixing bowl. Add the gel from the leftover strawberry filling, and whip thoroughly with an electric mixer. If you have a frosting pipe, use it to pipe frosting onto cupcakes; if not, scoop the frosting into a plastic zipper baggie, cut off the tip, and squeeze out the frosting in swirls on the cupcakes. Serve and enjoy!
Filling the cupcakes